PowerPoint is a highly innovative and versatile program that can ensure you a successful communication whether you’re presenting in front of potential investors, a lecture theatre or simply in front of your colleagues. Below are five features you should be using – if you aren't already. Learn everything about these tips: they will improve your presentation skills and allow you to communicate your message successfully.
1) Adding Smart Art

Don’t confuse SmartArt with the similarly named WordArt. Where WordArt just allows you to display text using a wide variety of different formats and effects, SmartArt is a comprehensive and flexible business diagram tool that greatly improves upon the ‘Diagram Gallery’ feature found in previous versions of Office.
Click the insert SmartChart Graphic to choose from a selection of options.
SmartArt can be used to create professional diagrams that include pictures and text or combinations of the two. An obvious use of SmartArt would be to create an organisation chart but it can be used for many different kinds of diagrams and even to provide some variety to slides using text bullet points.
2) Inserting Shapes

If you need to include some sort of diagram in your presentation, then the quickest and easiest way is probably to use SmartArt. However, it is important to be able to include shapes independently of SmartArt and worth being familiar with the various Drawing Tool format options.
Not only will they be useful if you do need to manually draw a diagram (and SmartArt doesn’t suit all diagrams), but they can also be applied to objects on a slide that you might not immediately think of as shapes. For example the box that contains your slide title or your content. This can be anything from text to a video, or even the individual shapes in a SmartArt diagram.
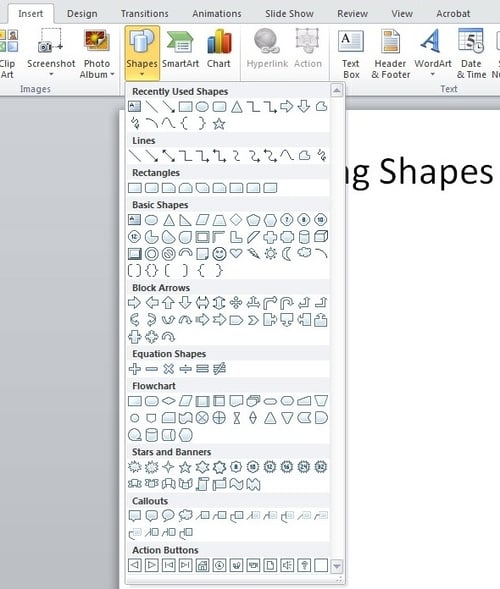
As you can see, the gallery of available shapes is very extensive. Once you have selected your chosen shape, you can just click in your slide to insert a default version of the shape or, to set a particular size and position, click and drag with the mouse to create the shape and size you want.
3) Inserting an Image

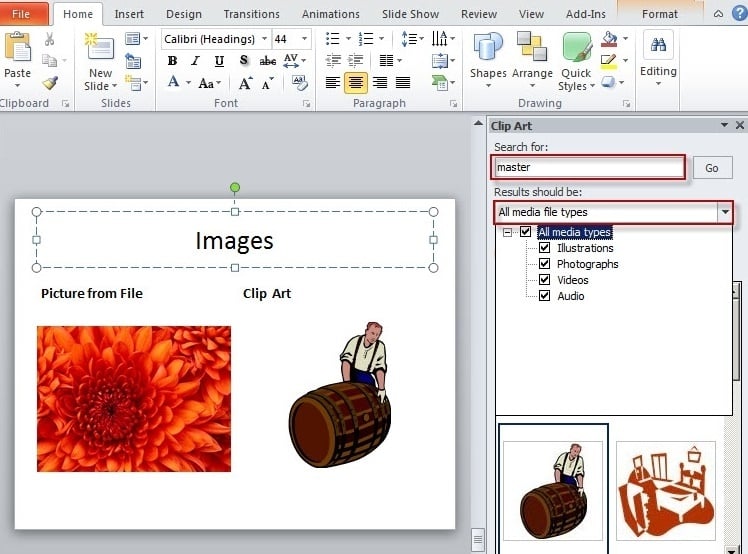
Here are two content type icons which appear in new content Placeholders for inserting pictures. You can Insert Picture from File or Insert Clip Art. Alternatively, the Illustrations group of the Insert ribbon tab includes the same two tools. In addition, PowerPoint 2010 has a new ‘Screenshot’ option that allows you to capture an entire window or part of a window for inclusion on a slide. You can also copy any image and just paste it directly to a slide.
Insert Picture from File allows you to browse to an image file saved somewhere on your system whereas Clip Art is held in an indexed gallery of different media types. Clip Art is not limited to pictures: ‘The Results should be:’ box lets you choose between: ‘All media file types’ and one or more of the following different types:
- Illustrations
- Photographs
- Video
- Audio
Once you have found the image you want to use, click on it to insert it into the current slide. You can now re-size and move the image accordingly with further editing options available when you right click the desired image.
Using a video in your presentation can help capture attention of the audience and increase message retention.
4) Slide Transitions

Properly used, slide transitions can be make your presentations clearer and more interesting and, where appropriate, more fun. Badly used, the effect of slide transitions can be closer to irritating or even nauseating. Simple animation effects are often used to add interest to bullet point text. Much more extreme animation effects are available but, in most cases, should be used sparingly if at all.
Two main kinds of animation are available in a PowerPoint presentation: the transition from one slide to the next and the animation of images/text on a specific slide.
In PowerPoint 2010 & 2013 there is also a separate Transitions ribbon tab that includes a gallery of different transition effects. These can be applied to selected slides or all slides. If you want to apply different transition effects to different groups of slides, then you might want to choose ‘Slide Sorter’ view from the Presentation Views group of the View ribbon.
5) Adding Animations

Whereas the transition effects are limited to a single event per slide, animations can be applied to every object on a slide – including titles and other text boxes. Many objects can even have animation applied to different components, for example each shape in a SmartArt graphic, each paragraph in a text box and each column in a chart. Animations can be applied to three separate ‘events’ for each object:
Entrance – how the object arrives on the slide
Emphasis – an effect to focus attention on an object while it is visible
Exit – how the object disappears from the slide
To apply an animation effect, choose the object or objects to be animated, then choose Animation Styles or Add Animation from the Animations toolbar.
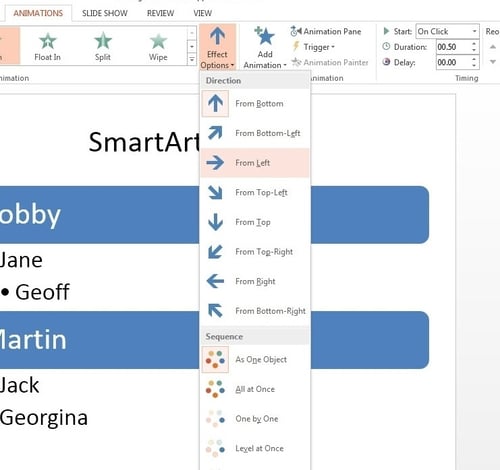
Where an animation is applied to an object with different components (for instance a SmartArt graphic made up of several boxes), the Effect Options tool becomes available to control how each component will be animated. So for example, your animation can be used to introduce elements of an organisation chart to your slide one by one.

No comments:
Post a Comment